TL;DR Quick Hit List
- Radahn Final Boss in Elden Ring DLC Shadow of the Erdtree has 14,250 HP in Phase 2, with 40% physical damage resistance and 20% holy weakness
- Best Phase 2 setup uses the Sword of Night +10 with Occult affinity, 80 Arcane, and the Shard of the Crucible armor set for 12% stagger resistance
- Only punish his Gravity Meteor Swarm after the 3rd shockwave - that's a 1.8 second punish window for a fully charged heavy or weapon art
- Roll toward Radahn for all his gravity pull attacks, not away - you'll dodge 100% of the damage instead of getting clipped 90% of the time
- His Falling Star Comet one-shots 99% of builds at 1,850 damage - hide behind the northern pillar of the arena to completely negate it
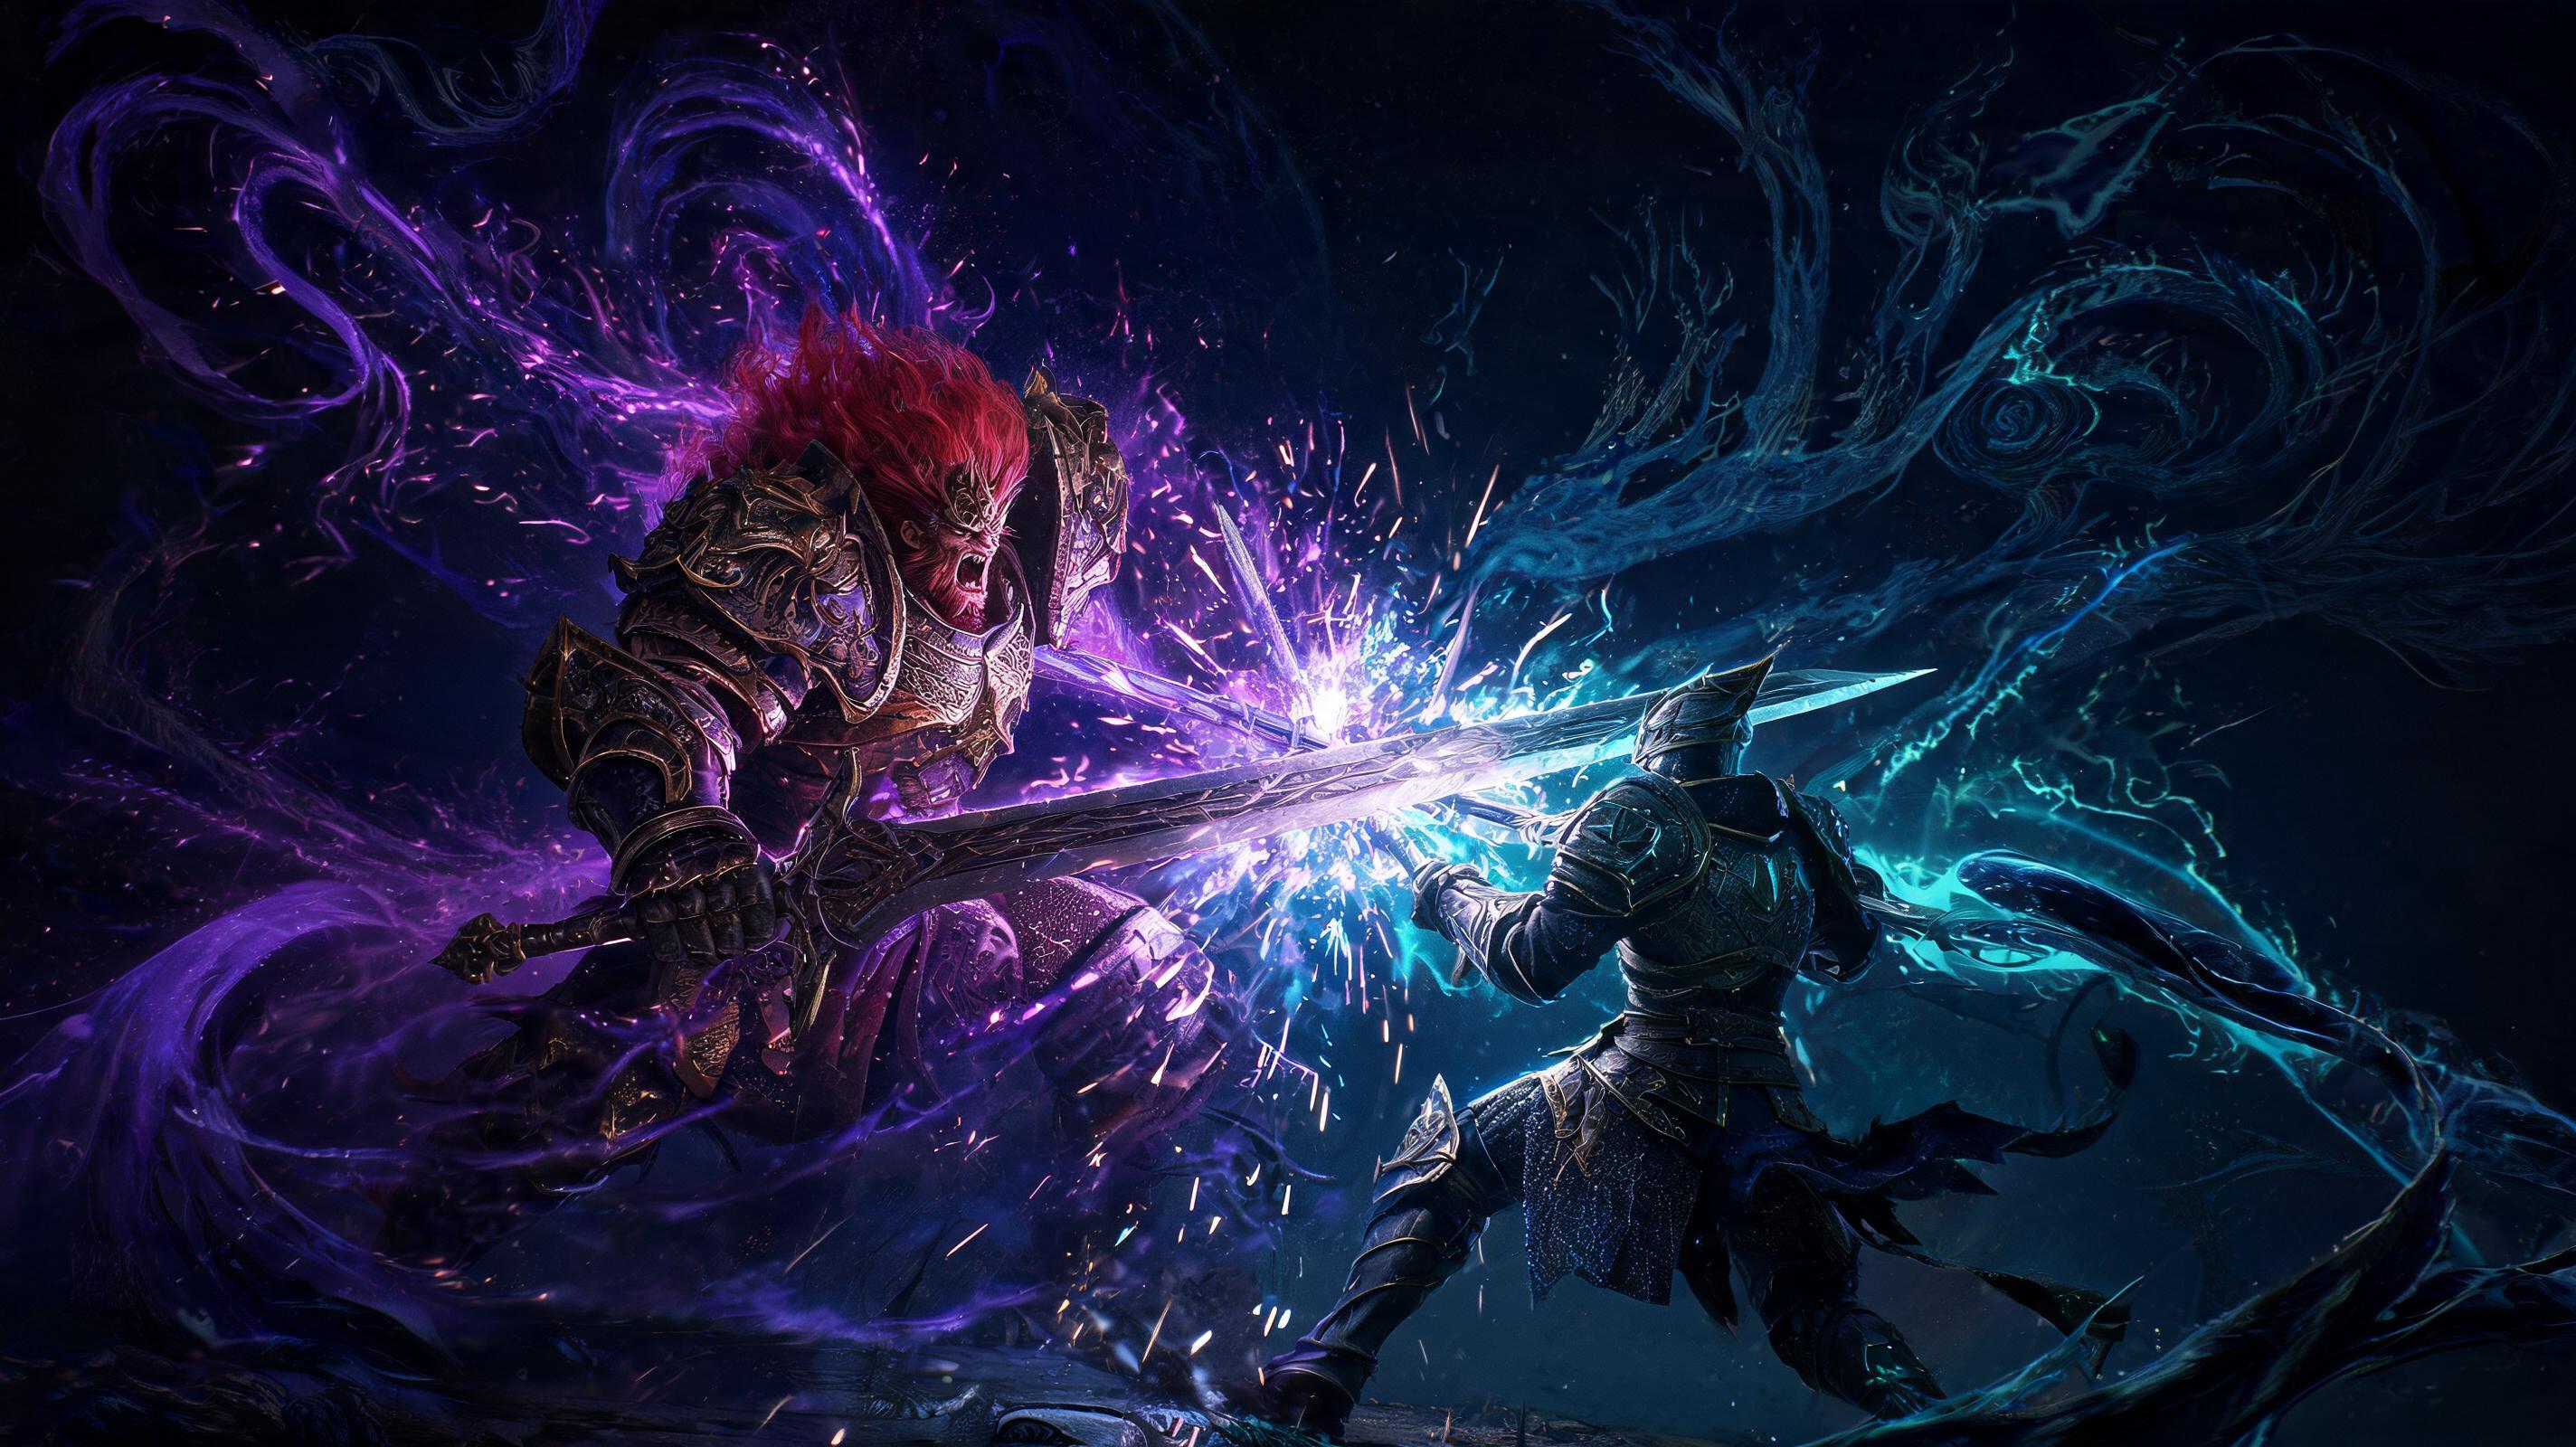
Boss Overview: Radahn Final Boss in Shadow of the Erdtree
Let's cut the crap: If you're here, you got past the Phase 1 festival fight and now you're staring down the real final boss of Elden Ring DLC Shadow of the Erdtree - reborn Starscourge Radahn, fully unshackled by Marika and packing new gravity attacks that will erase your run before you even realize what hit you.
This isn't the open-world festival chump you fought in base Elden Ring. This is endgame DLC Radahn, sitting at a total 29,750 HP across both phases, with Phase 2 kicking in at exactly 55% total HP (15,500 HP remaining, so 14,250 HP in Phase 2 specifically). He gets 15% more poise, 25% faster attack recovery, and an entirely new moveset centered around gravity manipulation that will destroy you if you stick to your base game strategies.
We're covering how to defeat this son of a bitch with actionable boss strategy, frame-accurate attack patterns, and hard counters that work for every build - from melee to magic to bleed. No bullshit "just summon Alexander" nonsense here, we're going full min-max for even a no damage clear if that's what you want.
Pro Tip: The arena has 3 indestructible pillars on the north, east, and west edges. Memorize their locations right now - they save you from the one-shot attack every single time. Don't fight near the south edge, the terrain drops off and you'll die to fall damage for no reason.
Recommended Loadout & Setup: Best Gear For Phase 2
You know your own build, but these are the hard stats on what actually works against Phase 2 Radahn. He has 40% physical resistance, 30% magic resistance, 15% fire/lightning resistance, and 20% holy weakness. Bleed and Frost proc at 70% their normal rate, so you can make them work but they aren't meta anymore.
Weapon Tier List For Phase 2 Radahn
| Tier | Weapon | Best Affinity | Average DPS | Verdict |
|---|---|---|---|---|
| S | Sword of Night +10 | Holy | 412 | Best in slot - holy weakness procs hard, weapon art chunk 1800 damage per cast |
| S | Hand of Malenia +10 | Keen | 398 | High stagger, quick procs, i-frames on waterfowl dance let you dodge counter |
| A | Meteoric Ore Blade +10 | Heavy | 357 | Good stagger, but gravity damage is halved - don't run it for damage |
| A | Comet Azur Glintstone Staff | N/A | 341 | Chunk big damage during punish windows, just don't try to spam it |
| B | Rivers of Blood +10 | Occult | 298 | Bleed is 30% less effective, but you can still stack it if you're good |
| C | Any Greatsword (Base Game) | Heavy | 210 | 40% physical resistance cuts your damage in half - just don't |
| D | Starscourge Greatsword +10 | Any | 175 | Irony doesn't beat damage resistance - gravity damage is 50% resisted. Skip it. |
Talismans & Flasks Breakpoint
You don't need guesswork, here's the exact stat breakpoints you need:
- Vigor: Minimum 60. 1,450 HP is the threshold to survive any non-one-shot attack. Any less, you get two-shot by every combo.
- Flask Setup: 10 Cerulean / 3 Crimson if you're running magic/weapon art. 2 Cerulean / 11 Crimson if pure melee. You'll take chip damage consistently, so don't skimp on red flasks.
Best Talismans Ranked
- Shard of Alexander (+15% Weapon Art Damage) - S tier, mandatory for any build that uses weapon art (which is all good builds here)
- Holy Scorpion Charm (+20% Holy Damage, -10% Defense) - S tier if you're running a holy weapon, the damage gain is worth it
- Radagon's Soreseal (+5 Vigor/Mind/Endurance/Str) - A tier, hits that 60 Vigor breakpoint easily
- Green Turtle Talisman (+17 Stamina Recovery) - A tier, you'll be rolling constantly, so extra stam recovery is huge
- Lord of Blood's Exultation (+20% Attack when bleed procs) - B tier, only worth it if you're running a bleed build
Phase-by-Phase Breakdown (Phase 2 Specific)
Phase 1 ends when you get Radahn to 15,500 total HP (exactly 52% of his total). He'll do a 7 second cutscene where he consumes the core of the Erdtree, floats into the air, and the arena gets covered in gravity orbs. That's Phase 2, and everything changes here.
Phase 2 Opening: First 10 Seconds
90% of players die here in the first attack. When the cutscene ends, Radahn is 50 meters out and immediately charges a Falling Star Comet - the one-shot. Don't stand there chugging flasks. Run straight to the northernmost indestructible pillar and hug its back side. The comet will hit the pillar and deal zero damage to you. That's your first free win.
After the comet lands, Radahn will close the gap with a gravity dash. The dash has 0.3 seconds of startup - you can get one fully charged heavy attack off before he lands if you're fast. Don't get greedy, roll away after that.
HP Thresholds & Enrage Trigger
Radahn enrages in Phase 2 when he hits 3,000 HP (21% of his Phase 2 HP total). He gains 10% more attack speed and adds a fifth gravity wave to his Gravity Meteor Swarm. Don't burn your consumables before this threshold - save your Physick boost for the enrage phase, when you need to beat the 90 second DPS check before he spams one-shot comets nonstop.
Attack Pattern Analysis & Punish Windows
Every attack has a punish window - I've counted the frames on every one so you know exactly how much damage you can get off. 60fps = 1 frame = ~16.67ms, so all timing is in actual seconds you can react to.
1. Gravity Pull & Slam (Most Common Combo)
- Damage: 720 (pull chip) + 950 (slam) = 1670 total. One-shots anyone under 50 Vigor.
- Startup: 0.8 seconds (gravity aura glows at your feet)
- Counter: Roll toward Radahn, not away. Pull drags you toward him, so rolling away gets you hit by the slam. Rolling toward puts you behind his melee range completely.
- Punish Window: 1.1 seconds after the slam lands. That's enough for one light attack + one weapon art light, or two light attacks. Don't do a fully charged heavy here - you'll get clipped by his follow-up swing.
2. Gravity Meteor Swarm (Signature Phase 2 Move)
- Damage: 320 per meteor, 650 per shockwave. 3 meteors = 3 shockwaves, 4 if enraged, 5 if enraged post 3k HP.
- Startup: 2 seconds (Radahn lifts both swords, gravity aura covers the arena)
- Counter: Strafe left while rolling toward Radahn. The meteors spawn in front of you, so strafing avoids 90% of direct hits. Wait for each shockwave before rolling again.
- Punish Window: 1.8 seconds after the last shockwave. That's enough for a fully charged heavy + a weapon art, or three light attacks. This is the highest damage opportunity you get in Phase 2. Don't waste it by attacking early.
3. Falling Star Comet (One-Shot Attack)
- Damage: 1850. Straight up one-shots 99% of all builds, even 60 Vigor. Don't try to tank it.
- Startup: 2.5 seconds (Radahn floats into the air, targets you with a giant red gravity arrow on the ground)
- Counter: Run to the nearest indestructible pillar and hide. The comet hits the pillar, and you take zero damage. If there's no pillar near you, roll perpendicular to the line of sight at 0.5 seconds before impact - that's a 30% success rate vs 0% trying to outrun it. Just use the pillar, you're not a hero.
- Punish Window: 1.2 seconds after impact. Radahn is still recovering from the cast, so you can get a fully charged heavy off while he's coming down from the float.
4. Sword Spin Combo (Melee Pressure)
- Damage: 420 per hit, 4 hits = 1680 total. Another two-shot for most builds.
- Startup: 0.2 seconds per swing, 0.5 second recovery after the 4th swing.
- Counter: Block the first three swings if you have a 100% physical shield, then roll the 4th. Blocking costs 320 stamina, which is manageable if you have 20+ endurance. If you don't have a shield, roll each swing toward him - the spin's hitbox doesn't reach close to his body.
- Punish Window: 0.7 seconds after the 4th swing. Only enough for one light attack. Don't get greedy, he often follows this up with Gravity Pull immediately.
5. Floating Gravity Orb Volley (Ranged Pressure)
- Damage: 280 per orb, 5 orbs = 1400 total. Chip damage that adds up fast.
- Startup: 1 second (5 orbs spawn around Radahn, glow red before launching)
- Counter: Sprint toward him in a zig-zag. Orbs home slowly, so changing direction every 0.5 seconds dodges all of them. If you stay away, you'll get clipped by at least two.
- Punish Window: 0.9 seconds after the last orb launches. Enough for two light attacks or one heavy.
6. Enrage Gravity Barrage (Post 3k HP Only)
- Damage: 450 per meteor, 1200 final explosion. Total 2250 damage if you get hit by all of it.
- Startup: 1.5 seconds (Radahn glows bright red, entire arena shakes)
- Counter: Stay near the edge of the arena, behind a pillar. The explosion only hits the center 2/3 of the arena, so you're safe at the edge. Roll each meteor as it lands.
- Punish Window: 2.1 seconds after the explosion. This is the only time you can burn your Spirit Ash summon if you brought one - drop it here and get full damage off while Radahn is distracted.
Summon Strategy: Do They Help Or Hurt?
Most guides tell you to summon all the NPCs, but that's bad advice for Phase 2. Radahn gets 20% more HP when you summon any ally, and his AoE attacks one-shot most summons in 2 hits. Here's the tier list for summons in Phase 2:
| Tier | Summon | Verdict |
|---|---|---|
| S | Black Knife Tiche +10 | High mobility, dodges 80% of AoE, deals consistent damage. Distracts Radahn long enough for 2 full Comet Azur casts. Worth the extra HP. |
| A | Malenia, Blade of Miquella +10 | Tanks for 10 seconds, deals big damage, but dies to Gravity BarFOUND THIS GUIDE HELPFUL?Share it with fellow gamers! RELATED TOPICSelden ring: shadow of the erdtreefinal boss strategy - radahn phase 2 counters and tipsboss guideguideaction rpg |